Okay, so you want to dry brush miniatures? Dry brush painting is one of the simplest and most under-rated ways to paint miniatures. When painting miniatures, many people head straight for the more advanced techniques. But, why? Dry brushing is not only simple, but many professional painters rely on it to complete their work.
Dry brushing is a simple and easy way to highlight miniatures with color. It’s very easy to get tricked into thinking you can perform the technique thoughtlessly. Dry brushing does require a bit of planning.
If you’re looking for an example of how to dry brush, continue reading below!
Quick tips for dry brushing
- Do not use an expensive brush for dry brush painting. Cheap arts and craft brushes work great (here are few examples).
- Use paint directly from the bottle or pot.
- Use a dry palette if you are using paints from a dropper bottle.
- Dry brushing takes practice for all miniature painters
- The best models for dry brushing are those with a lot of edges, crevices, and texture, e.g., fur, textured skin, or the hard edges of armor plates.
")
Best brushes for dry brushing?
A stiff bristled brush with a large, soft belly is best for the dry brush painting technique.
The quality of the brush doesn’t matter either, as long as the bristles don’t fall out. Dry brushing is a great way to destroy a brush. In general, a brush with a stiff bristles, but a lot of them (a voluminous belly) to load up on the “dried” pigments are the best for providing an enjoyable dry brushing experience.
I recommend two dry brushes based on my model painting experience:
Princeton Mixed-Media Mop Synthetic, Size 1/4 Inch

Simple, inexpensive, and very effective as a dry brush, this Princeton mixed-media mop synthetic brush works great. For the price of a single brush, you can afford multiples and abuse them all you like.
The medium-sized flat edge works well for many miniatures in the 28-35mm tabletop wargaming scale. For bigger models, you can find similar brushes with larger “mops” for dry brushing larger surfaces.
Games Workshop Citadel Brush: Medium Dry Brush

I’ve used the Games Workshop Citadel Dry Brush for hundreds of models. As a stiff bristled brush it is slightly more expensive than arts & craft brushes from the budget bin, but I’ve yet to find a reason to toss out my Citadel dry brushes. They keep asking for more!
These work great for units, medium sized vehicles, and terrain. For best results, keep these clean after each use. The bristles are very durable, stiff, and hold a good amount of dry pigment. I highly-recommend Citadel dry brushes for the technique.
For cheaper alternatives, I’ve also found that cosmetic make-up brushes work well as dry brushes. (Fun fact: applying make up blush is essentially a dry brush technique).
Check out these affordable make-up brushes that can double as modeling dry brushes.
What kind of paint do you use for dry brushing?
You can use almost any water- or oil-based paint for dry brushing. For miniature painting, however, acrylic water-based paints are the most common.
Although you can dry brush with inks, tempera paints, or even watercolor paints (I’ve tried), these media aren’t meant for dry-brushing. Sure, you can try and remove the water content, but in the end I don’t think its worth the effort given all the other paint options available.
Choose an acrylic model paint that is more viscous and thick, which you can load onto your brush.
Read on for more info about recommended paints for dry brushing.
Recommended acrylic model paints for best results with dry brushing
The best paints for dry brushing are those that load easily on your brush, have low moisture content (you can remove some of it) and high pigment density. You can use the dry brushing technique with any acrylic hobby paint.
In general, I observed that paints with higher-density pigment worked best (are most consistent), but only if they have at least a medium-thickness paint viscosity that helps load the brush.
If I had to rank model paints in terms of best model paint for dry brushing, here’s my list in descending order:
- Games Workshop Citadel Dry Paint
- Games Workshop Citadel Base Paint
- Reaper Master Series
- Vallejo Game Color Paint
- Vallejo Model Color Paint
- Scalecolor
- Games Workshop Citadel Layer Paint
- Army Painter Model Paints
- Scale 75 Fantasy & Games Paints
- Badger Minitaire Paints or Other Airbrush Ready Paints
I’m 100% sure I missed some of the favorite model paints, e.g., Kimera, the other emerging paint lines, and quite possibly offended a few of you with my impression of these paints.
| Brand | Dry brushing ability? | |
|---|---|---|
 |
Citadel Dry Paint | Great dry brush paints by Citadel. These are specialized paints that work straight from the pot for drybrushing techniques (awesome!) |
 |
Citadel Base Paint | Excellent high-pigment density and consistent pot-to-pot, Citadel base paints are great for dry brushing |
 |
Reaper Master Series | Reaper Master Series paints are very good for dry brushing, with consistency across the paint line. These are some of my favorite paints for wet-blending techniques. |
 |
Vallejo Game Color Paint | Vallejo Basic Color paints are great for their versatility, including dry brushing. There is some variability color-to-color in terms of how well they produce good results with dry brushing |
 |
Vallejo Model Color Paint | Similar to Vallejo Basic Color paints, these Vallejo Model Color paints work well for dry brushing; but be aware some colors work better than others. I do love these paints for wet-blending |
 |
Scalecolor | Scalecolor paints in general are amazing for their matte finish, consistent behavior when thinned with water, and strong vibrant colors. However, for dry brushing, they are difficult to use as they don’t coat the brush as consistently or easily without some practice |
 |
Citadel Layer Paint | Citadel Layer paints are all-around good media for other painting techniques. For dry brushing, I find some colors are better than others. Avoid yellow and orange hues if you can. |
 |
Army Painter Fanatic Model Paints | Army Painter Fanatic paints are great for their value (you get a lot for the money). Here’s a quick review of AP Fanatic Paints. |
 |
Scale 75 Fantasy & Games Paints | Like Army Painter model paints, you’ll need to shake/mix these very well to get the best results with Scalecolor Fantasy & Game paints. |
 |
Badger Minitaire Paint or Similar Airbrush Paints | Airbrush-ready paints are pre-thinned and generally less useful for dry brushing. I would not recommend airbrush ready paints for dry brushing. |
How to dry brush (5-step summary)
- Load your brush by dipping the tip into your paint.
- Wipe the brush on a dry paper towel until most of the moisture is removed.
- Check how pigment is left on your hand/skin or on a clean piece of paper with a few light sweeps.
- If pigment only deposits on the ridges of your skin or shows only the paper texture, then you’re ready to use the dry brush on your miniature.
- Make sure your brush is dry and you use gentle pressure. Too much pressure or moisture/dampness will ruin the dry brush effect.
Which should you do first? Drybrush or wash?
For best results, I suggest you drybrush after you apply a darkening wash or shade. Here’s why: A drybrush works best when you’re painting a highlight color that is bright. This is because dry brushing a technique that you use to paint the raised textured surface on a model. In contrast, a wash or shade darkens a model.
If you’re painting a miniature to a tabletop or battle ready standard, a popular and reliable process is to paint your base coat main colors. Then, you would apply a wash (or shade, e.g., Citadel shade) over the model to add shadow tones and increase contrast on the entire miniature.
Of course, by applying a darkening shade, all your colors darken. To brighten them back up and pull up highlights that you may have lost with the shade/wash application, you use a drybrush technique as a final step.
How do you dry brush paint on miniatures, models, and other surfaces with acrylics?
How you dry brush paint depends on the model and your desired effects. In principle, dry brushing allows you to quickly add paint only on raised textures on a model surface.
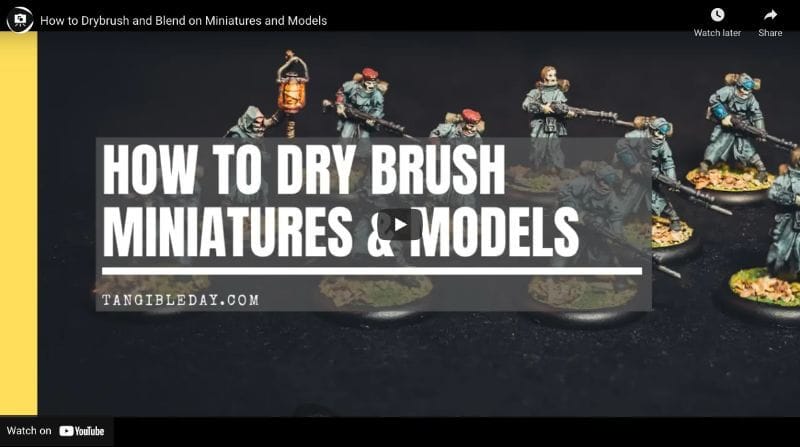
Here I show you the overall process of dry brushing. A video of the entire process is linked below.
MORE: 17 COMFORTABLE HANDLES/HOLDERS FOR PAINTING MINIATURES AND MODELS
It’s easy and simple!
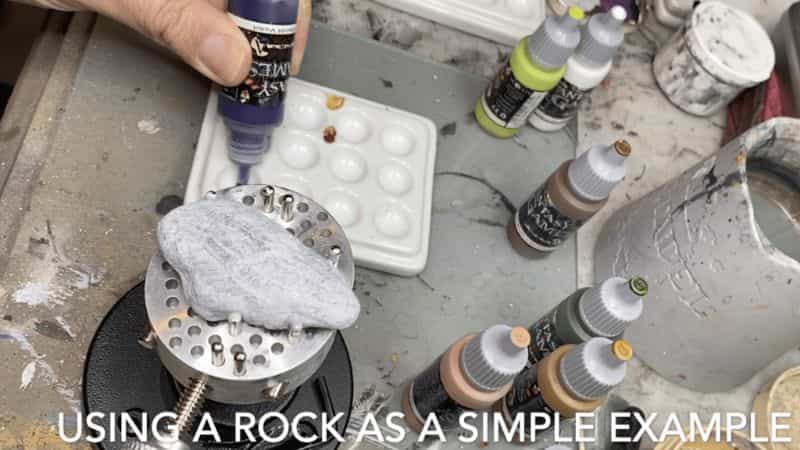
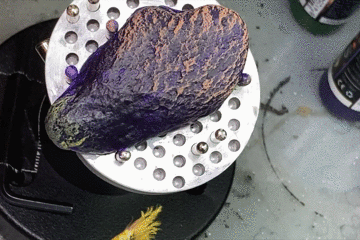
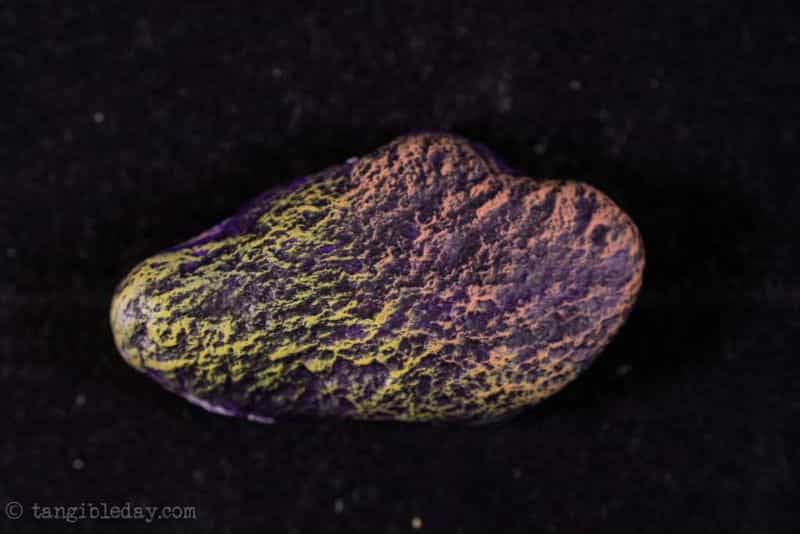
I use a rock as a surface reference that you can take as a proxy for any miniature or model you may want to paint in the future.
The dry brushing procedure is the same. The principles are universal.
1. Prime your model surface
As with an painting project, it is best to work on a surface prepared with a good primer. Check out a few of my favorite primers here.
For most work, I use Vallejo Surface Primer applied with an airbrush. In this case, I used a grey colored primer for your visibility and better camera work.
2. Base coat the model with your first color
Apply your first color in a smooth, even coat across the surface you are painting. This may take a few layers. If it does, make sure to keep your paint thin enough for it to flow off your brush, but thick enough that it covers well.
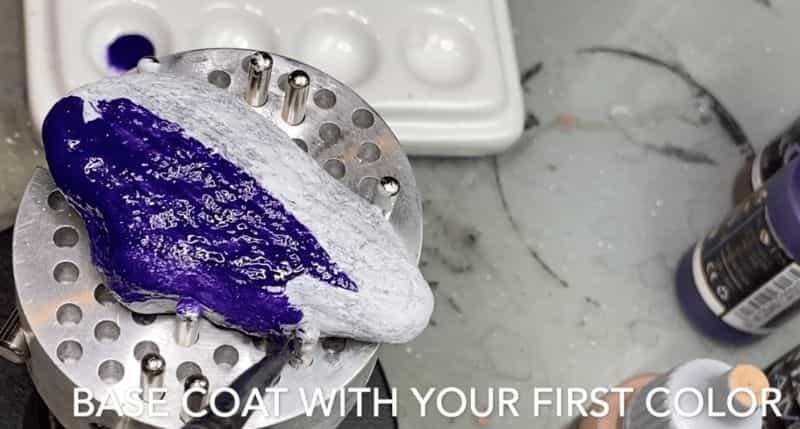
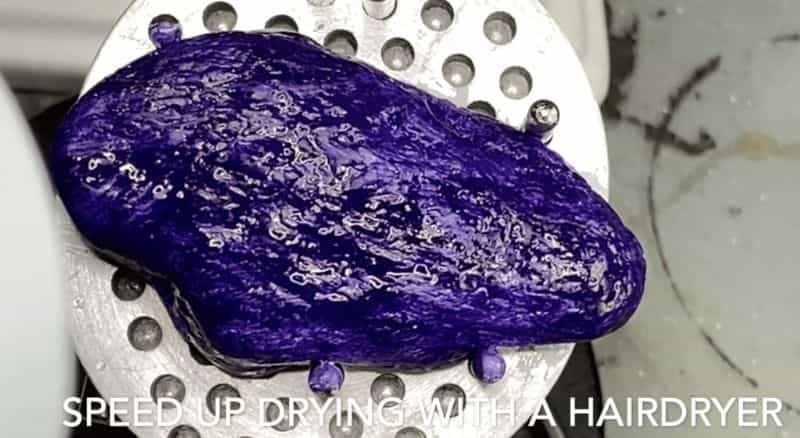
Each base coat layer should be applied carefully to avoid smudges and splotches. Wait for each layer to dry before applying another.
If you’re impatient like I am, use a hair dryer.
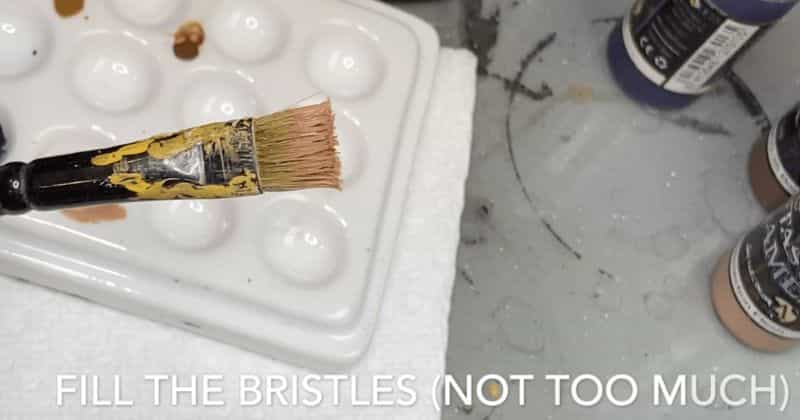
3. Load your dry brush
How you load your dry brush is important. Make sure your dry brush is already dry (duh!).
Wipe any moisture off on a clean paper towel, if you’ve just cleaned your brush.
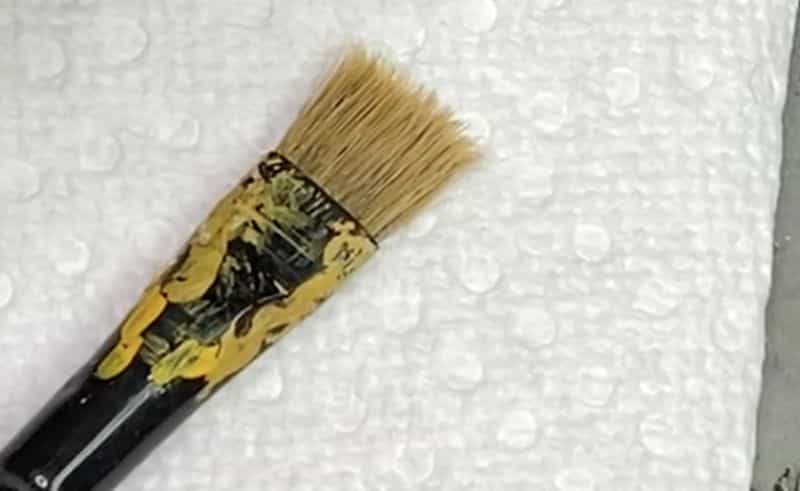
Dip your brush into your paint.
Make sure both sides of your brush are coated in paint.
Here I’m using Scalecolor paints (Fantasy & Games model paints), and a Citadel Medium Dry Brush.
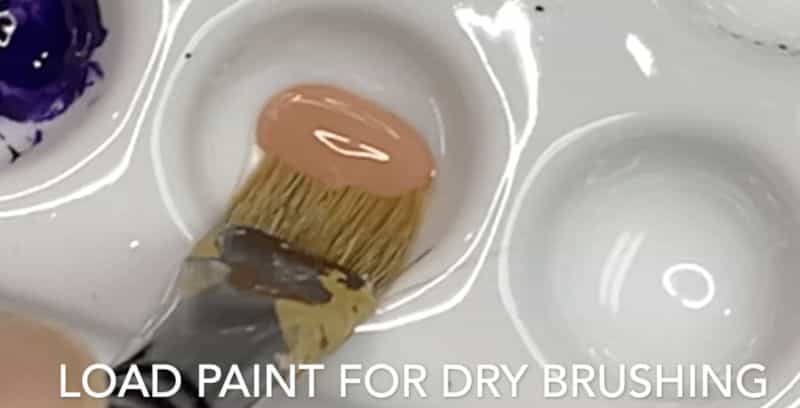
Wipe off any excess paint on the side of your palette (or pot).
Your bristles should have a good amount of pigment in the bristles.
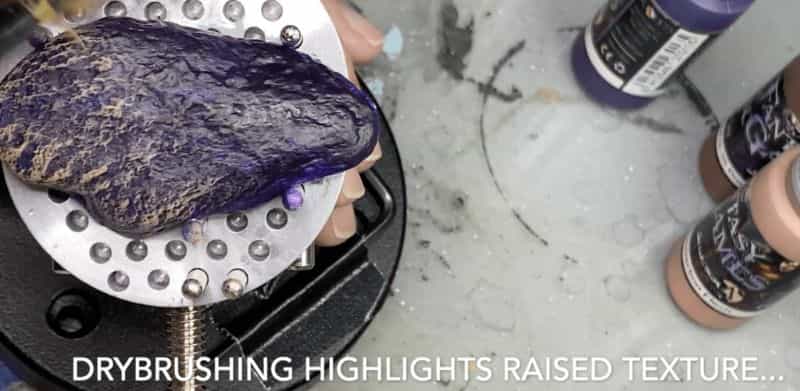
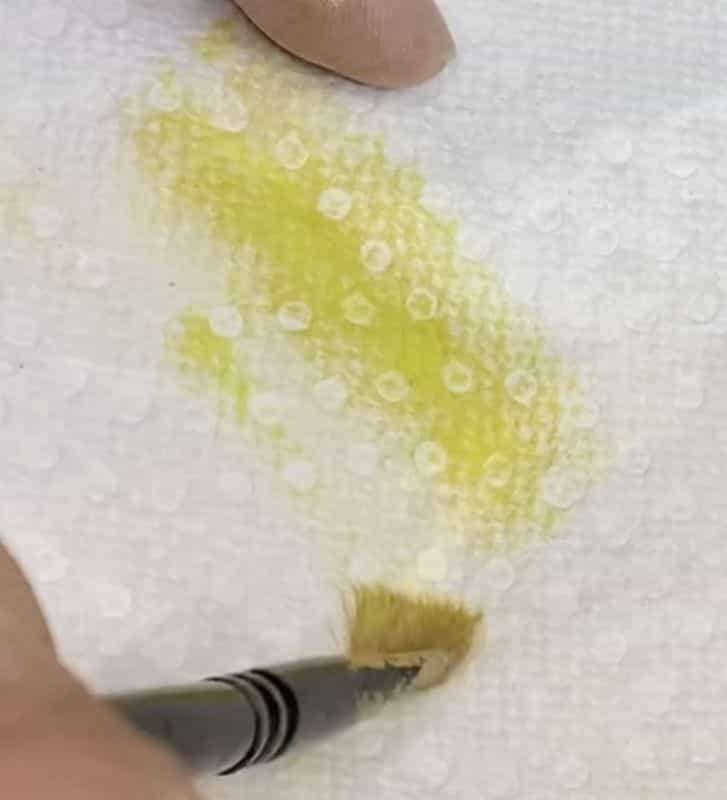
4. Remove excess moisture from your brush
This is an easy step, but many people overlook how important this is to do properly.
Wipe your brush on a paper towel back and forth.
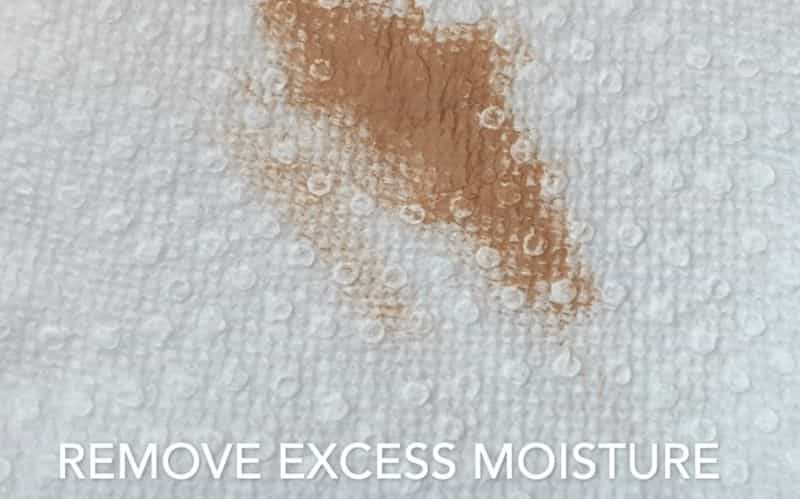
Do this until your brush barely leaves behind any paint pigment. In other words, only a bit of paint should appear with each stroke on the paper towel on the raised texture.
Side note: I hate wasting paint, but this is a means to an end. The better you perform this step, the less time and paint you’ll waste trying to fix your mistakes
5. Apply your “dry brush”
Use light, quick strokes, to gently apply your dry brush onto your working surface.
A low to zero-pressure sweeping action will leave behind a small bit of pigment on each stroke. Repeat the process until you are satisfied with the result.
If you need more paint on your model surface, repeat from step #3 (load your brush).
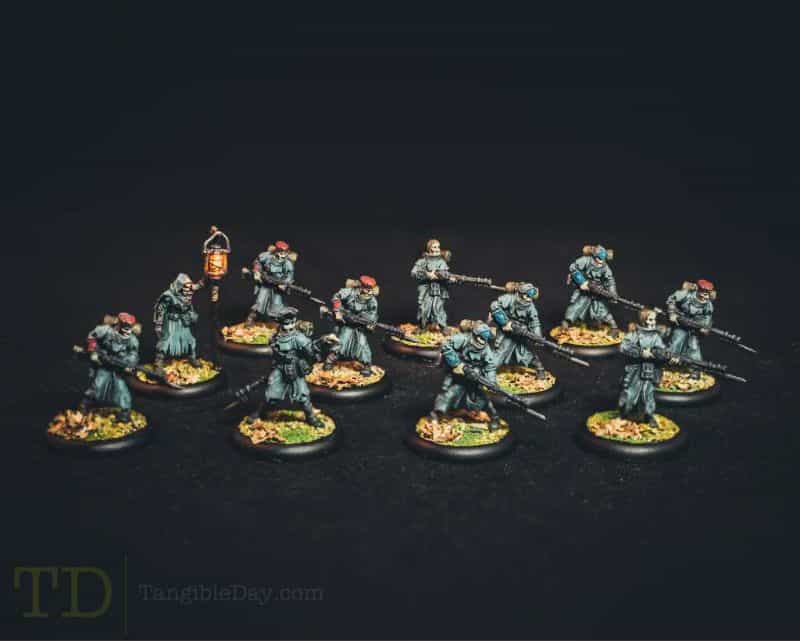
Ultimately, the purpose of drybrushing is to paint only the raised textured surface of your miniature or model. The effect is versatile because you can use it to create other special effects.
If you only need to dry brush with a single color, you can stop here and continue finishing other parts of your model.
6. Blending paint colors with dry brushing
For a slightly more advanced approach with dry brushing, you can start blending different colors together.
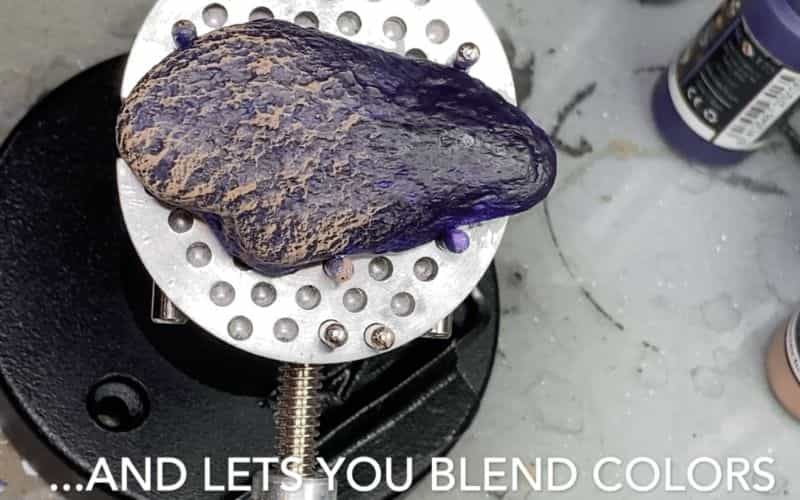
This can be useful for adding object-source-lighting (OSL), or simulating magical effects on your miniatures.
RELATED: 8 MUST-KNOW ADVANCED PAINT BLENDING TECHNIQUES
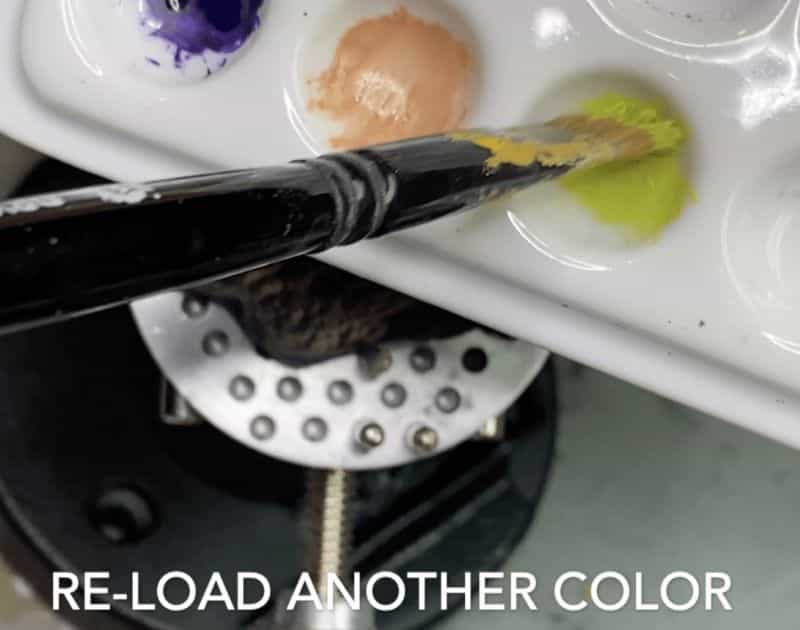
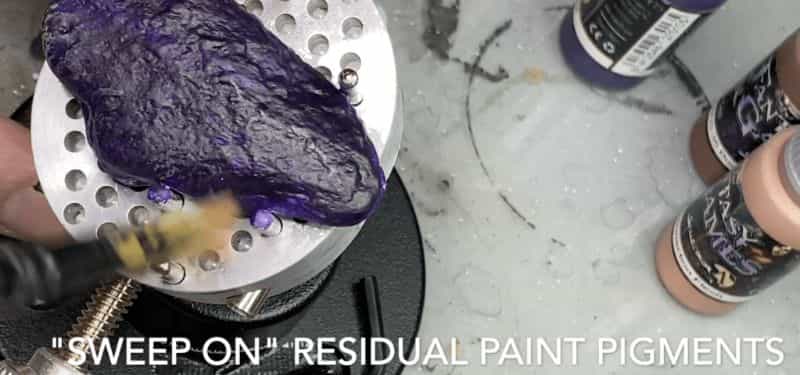
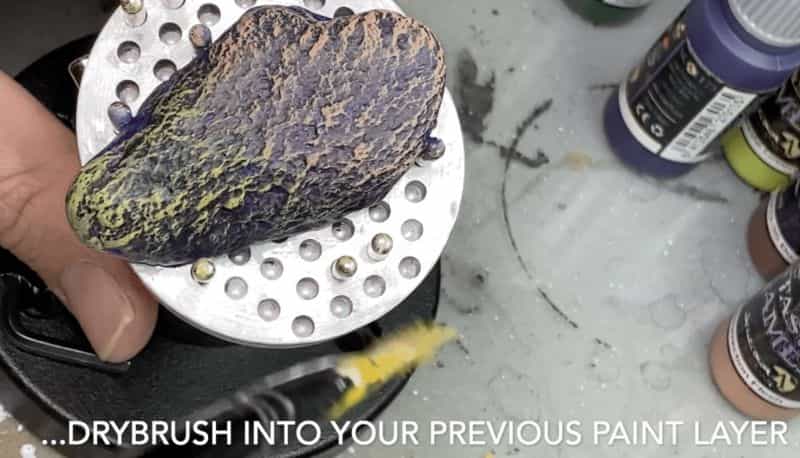
To start blending with dry brushing, load your brush with another color.
Follow steps #3 thru 5.
But this time, drybrush into your previous dry brushed layer.
Using light strokes, you can “mix” the two colors together. Slowly add pigment with light brush strokes into the other color you wish to transition into.
Repeat this process until you’re satisfied with the result.
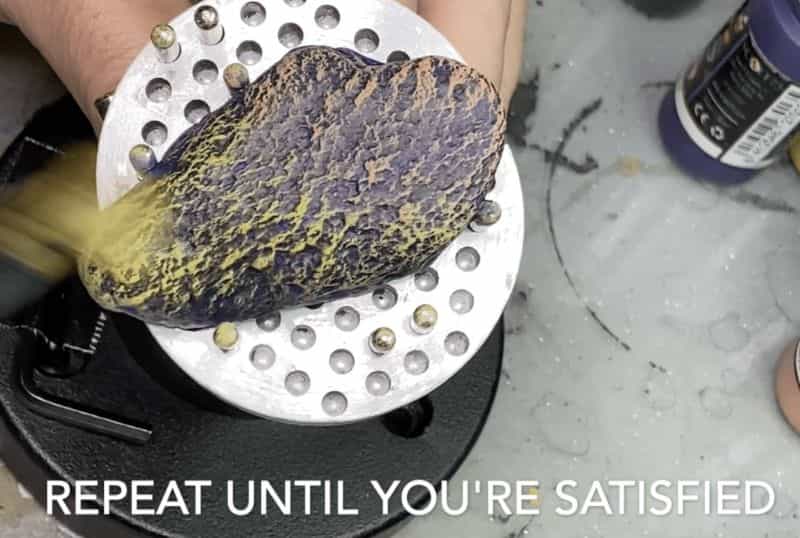
It is best practice to add dry brush layers in light coats, rather than try to apply paint all at the same time. Using thinner coats gives you more control over the subtle adjustments in color.
In this regards, dry brushing is a powerful technique and should not be underestimated. You can win painting competitions with the effects achievable with dry brushing alone.
Here’s a video of the entire dry brushing process.
7. Varnish (seal) your model
When you are finished with your painted miniature, make sure to varnish the entire surface.
For best results, I use a matte varnish. This not only protects the model and all the work you have done, but also evens out the reflectiveness of your miniature.
MORE: BEST LIGHT FOR PAINTING MINIATURES
A good varnish increases the overall contrast of your work and helps keep your colors vibrant even under poor lighting conditions (too dark or bright).
Final Thoughts
Learning how to dry brush is simple. It doesn’t take many tools or pre-learned skills to get started with right away. The effects achieved with dry brushing are immediate and satisfying, too.
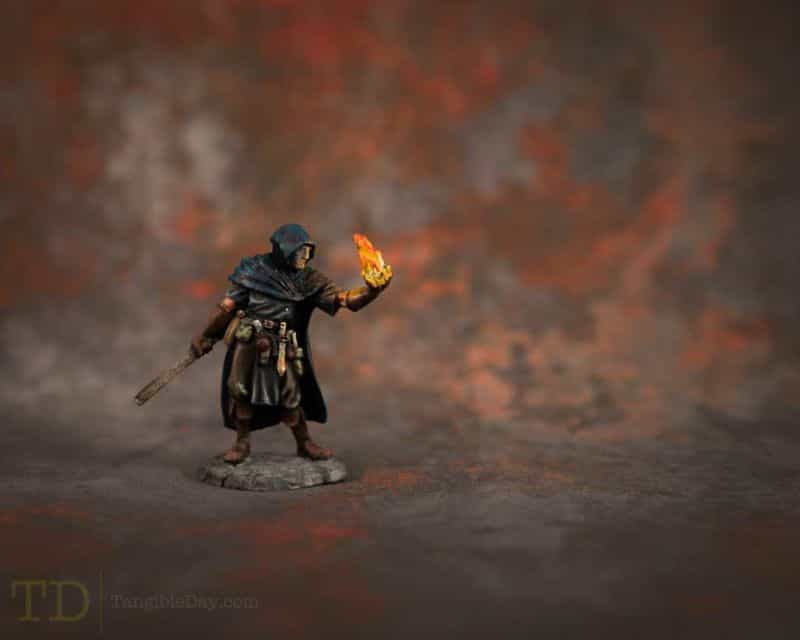
Check out my gallery for examples of my work.
Best 5 model paints for dry brushing miniatures (my opinion):
I love to experimenting with painting techniques. For more about painting miniatures and other hobbies, check out these painting articles.
I’m writing more as you read!
I hope you found these tips and tutorial helpful.
Happy painting!!!
Enjoying Your Visit? Join Tangible Day
Free newsletter with monthly updates (no spam)
Leave a comment below! Follow on X, Instagram, and Facebook.

Tangible Day on YouTube (Miniatures and More!)
